
02 Aug Using Visual schedules

Using visual schedules
Have you ever wondered about using visual schedules with your child? Here are some timps for getting started.
I often get asked by both parents and other therapists ‘How can I get my child/client to participate?’ If you wonder this too, keep reading 🙂 I think I’ve got a good solution!
As much as we’d love to focus the whole day doing only the things we like to do, the reality is that sometimes we need to do things we don’t like doing. For me, it’s writing reports – a necessary, but, at times, tedious evil. So what do I do? Well, usually, I will set aside a small bit of time in my calendar- say an hour or so – to get started on the report. After this hour, I will schedule something preferred – perhaps a break with a cup of tea and 15 minutes of Netflix. I find, though, that once I get started, I often don’t stop after that hour. I find that writing the report isn’t actually that bad. But, I still indulge in a cuppa and some Netflix when I’m done.
Visual schedules are useful for children with difficulties with transitions, waiting or completing non-preferred activities. It helps children know what’s coming up, anticipate the onset of non-preferred activities as well as the termination of preferred activities. Finally, they are magical for building independent engagement.
I use visual schedules for myself, my children and my clients. Visual schedules can take many different forms. When my children were young we used pictures. Now they are older, we use written schedules. I was reminded of exactly how helpful schedules can be over the homeschooling period with COVID-19. I think my husband and I would have lost the plot if it weren’t for our trusty whiteboard and texter laying out the order of events and tasks to be completed for my son.
If I had to pick one skill to teach parents, it would be to effectively use schedules to structure the day. With the ever looming possibility of homeschooling, scheduling is possibly going to a lifesaver.
Here are my top tips for introducing a visual or written schedule.
- Identify the format of your visual schedule. Some ideas:
-
-
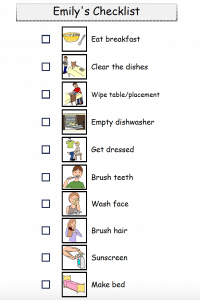
- A pre-printed checklist of activities that need to be completed during a certain time each day, e.g. a morning checklist. This best if the same activities occur each day and no flexibility is needed.
- A laminated page with a Velcro strip for activities. Pictures can be flexibly added to the schedule as needed. You can also include a ‘finished’ area to move pictures to when activities are finished.
- A first then board for two activities (typically a non-preferred followed by a preferred)
- A white board for a written checklist or a drawn checklist (depending on your artistry skills ☺) This is an easy to implement option and has the added advantage that your child can ‘wipe’ away the activity when it’s finished. Soooo satisfying.
- Identify some preferred activities, i.e. activities your child enjoys and will always reliably engage in. Create photos/pictures/symbols representing each of these activities. Google images is a great resource for these pictures.
- Identify some less preferred activities, i.e. activities your child doesn’t enjoy and/or avoids. Create photos/pictures/ symbols representing each of these activities.
- Start small. When first implementing a visual schedule, start with a specific, short part of your day, e.g. morning routine or a short independent play routine. This allows you to try the new process and tweak it before rolling it out across the day.
- When planning your schedule, preferred and non-preferred activities should be interspersed such that a preferred activity always follows a non-preferred activity. When first starting out, make the non- preferred activities short and easy so your child experiences success.
- FIRST: Pack your puzzle away
- THEN: 5 minutes on the trampoline.
- You can increase the amount of time spent on the first activity and decrease time on second activity as your child builds up success.
- Where possible, involve your child with setting up their schedule. Offer them choices of preferred activities, and if possible allow them to choose the order in which they’d like to do the non-preferred activities.
- Assist your child in completing the non-preferred activities on the schedule. When they do (even if they need help) allow them to do the preferred activity.
- When your child is easily completing one non-preferred/one preferred activity, you can include two non-preferred/one preferred, then three…
- Make sure that your child is successful- if they start to refuse or complain, reduce number and/or difficulty of activities again.
- Encourage your child to manage/follow their own schedule as much as possible (rather than needing an adult to support them all the time).
- For open ended activities (e.g. screen time, playdoh, outside) – use timers to time the amount of time your child can assess an activity. When the timer goes off, that activity is finished.
- Provide lots of praise and encouragement for completing any activities without refusing/whingeing or other behaviours.
- Note: The above strategy can also be used to increase children playing by themselves (the ‘non-preferred’ part) while you play with a sibling, make a phone call, chat to your partner or have a cup of tea.
-
For a downloadable version of this tip sheet, please click here.
odpri racun na binance
Posted at 16:45h, 18 OctoberThanks for sharing. I read many of your blog posts, cool, your blog is very good.
binance
Posted at 03:52h, 27 OctoberThank you for your sharing. I am worried that I lack creative ideas. It is your article that makes me full of hope. Thank you. But, I have a question, can you help me? https://www.binance.com/ru/register?ref=V3MG69RO
Anonymous
Posted at 08:19h, 20 NovemberThanks for sharing. I read many of your blog posts, cool, your blog is very good.
Sign Up
Posted at 04:04h, 22 NovemberThanks for sharing. I read many of your blog posts, cool, your blog is very good.
binance referral code
Posted at 21:52h, 25 NovemberYour article helped me a lot, is there any more related content? Thanks!
odprite racun na binance
Posted at 10:06h, 07 DecemberI don’t think the title of your article matches the content lol. Just kidding, mainly because I had some doubts after reading the article.
binance
Posted at 06:23h, 09 DecemberThanks for sharing. I read many of your blog posts, cool, your blog is very good.
binance
Posted at 12:25h, 12 DecemberThanks for sharing. I read many of your blog posts, cool, your blog is very good. https://www.binance.com/register?ref=P9L9FQKY
Mag-sign up sa Binance
Posted at 04:40h, 23 DecemberThank you for your sharing. I am worried that I lack creative ideas. It is your article that makes me full of hope. Thank you. But, I have a question, can you help me?
binance
Posted at 08:45h, 03 JanuaryThanks for sharing. I read many of your blog posts, cool, your blog is very good.
bonificación de registro en Binance
Posted at 15:14h, 07 JanuaryCan you be more specific about the content of your article? After reading it, I still have some doubts. Hope you can help me.
Binance注册
Posted at 18:31h, 13 JanuaryYour point of view caught my eye and was very interesting. Thanks. I have a question for you.
Create a free account
Posted at 03:03h, 23 JanuaryI don’t think the title of your article matches the content lol. Just kidding, mainly because I had some doubts after reading the article.
binance
Posted at 07:11h, 28 JanuaryYour article helped me a lot, is there any more related content? Thanks!
Binance
Posted at 23:15h, 30 JanuaryThanks for sharing. I read many of your blog posts, cool, your blog is very good.
binance konta izveide
Posted at 22:43h, 07 FebruaryThanks for sharing. I read many of your blog posts, cool, your blog is very good.
бнанс створення акаунту
Posted at 06:12h, 08 FebruaryThank you for your sharing. I am worried that I lack creative ideas. It is your article that makes me full of hope. Thank you. But, I have a question, can you help me?
binance
Posted at 05:16h, 10 FebruaryThank you for your sharing. I am worried that I lack creative ideas. It is your article that makes me full of hope. Thank you. But, I have a question, can you help me?
Vytvorení bezplatného úctu
Posted at 15:22h, 17 FebruaryYour article helped me a lot, is there any more related content? Thanks!
бнанс Рестраця
Posted at 21:00h, 20 FebruaryYour article helped me a lot, is there any more related content? Thanks!
Бонус за регистрацию в binance
Posted at 10:55h, 24 FebruaryThanks for sharing. I read many of your blog posts, cool, your blog is very good.
Sign up to get 100 USDT
Posted at 08:28h, 25 FebruaryYour article helped me a lot, is there any more related content? Thanks!
^Inregistrare
Posted at 19:03h, 03 MarchThanks for sharing. I read many of your blog posts, cool, your blog is very good. https://accounts.binance.info/en-IN/register?ref=UM6SMJM3
binance алдым-ау бонусы
Posted at 01:24h, 04 MarchThanks for sharing. I read many of your blog posts, cool, your blog is very good.
binance
Posted at 04:33h, 07 MarchYour point of view caught my eye and was very interesting. Thanks. I have a question for you.
binance
Posted at 03:06h, 10 MarchCan you be more specific about the content of your article? After reading it, I still have some doubts. Hope you can help me. https://accounts.binance.com/zh-CN/register?ref=VDVEQ78S
binance odkazov'y kód
Posted at 13:24h, 15 MarchYour article helped me a lot, is there any more related content? Thanks!
Pieregistrējieties, lai sanemtu 100 USDT
Posted at 19:05h, 23 MarchYour article helped me a lot, is there any more related content? Thanks!
Регистрация в binance
Posted at 16:42h, 27 MarchCan you be more specific about the content of your article? After reading it, I still have some doubts. Hope you can help me.
注册Binance
Posted at 06:20h, 02 AprilYour point of view caught my eye and was very interesting. Thanks. I have a question for you.
"oppna ett binance-konto
Posted at 06:32h, 06 AprilCan you be more specific about the content of your article? After reading it, I still have some doubts. Hope you can help me.
binance kods
Posted at 05:59h, 12 AprilI don’t think the title of your article matches the content lol. Just kidding, mainly because I had some doubts after reading the article.
www.binance.com注册
Posted at 07:50h, 25 AprilYour article helped me a lot, is there any more related content? Thanks!
Binance Signup Bonus
Posted at 02:12h, 02 MayYour article helped me a lot, is there any more related content? Thanks!
binance тркелг
Posted at 23:12h, 29 MayThanks for sharing. I read many of your blog posts, cool, your blog is very good. https://accounts.binance.com/vi/register?ref=WTOZ531Y
^Inregistrare pe Binance
Posted at 01:16h, 03 JuneCan you be more specific about the content of your article? After reading it, I still have some doubts. Hope you can help me.
免费Binance账户
Posted at 06:08h, 17 JuneCan you be more specific about the content of your article? After reading it, I still have some doubts. Hope you can help me.
inscreva-se na binance
Posted at 16:38h, 18 JuneCan you be more specific about the content of your article? After reading it, I still have some doubts. Hope you can help me. https://accounts.binance.com/bn/register-person?ref=UM6SMJM3
binance referral bonus
Posted at 11:01h, 01 JulyCan you be more specific about the content of your article? After reading it, I still have some doubts. Hope you can help me.
Index Home
Posted at 20:15h, 04 JulyThank you, your article surprised me, there is such an excellent point of view. Thank you for sharing, I learned a lot.
Index Home
Posted at 20:31h, 07 JulyThank you for your sharing. I am worried that I lack creative ideas. It is your article that makes me full of hope. Thank you. But, I have a question, can you help me? http://ev-io.cryptostarthome.com
binance registrirajte se
Posted at 22:42h, 08 JulyYour point of view caught my eye and was very interesting. Thanks. I have a question for you.
binance Kontoerstellung
Posted at 02:18h, 18 JulyI don’t think the title of your article matches the content lol. Just kidding, mainly because I had some doubts after reading the article.
binance sign up bonus
Posted at 09:34h, 29 JulyI don’t think the title of your article matches the content lol. Just kidding, mainly because I had some doubts after reading the article.
Utwórz konto osobiste
Posted at 08:21h, 08 AugustCan you be more specific about the content of your article? After reading it, I still have some doubts. Hope you can help me.
Anonymous
Posted at 23:50h, 10 AugustThanks for sharing. I read many of your blog posts, cool, your blog is very good.
binance профил
Posted at 00:48h, 11 AugustYour article helped me a lot, is there any more related content? Thanks!
Skapa ett gratis konto
Posted at 13:50h, 15 AugustThank you for your sharing. I am worried that I lack creative ideas. It is your article that makes me full of hope. Thank you. But, I have a question, can you help me?
free binance account
Posted at 07:35h, 18 AugustYour article helped me a lot, is there any more related content? Thanks! https://www.binance.com/sl/register?ref=OMM3XK51
binance code
Posted at 22:44h, 18 AugustYour article helped me a lot, is there any more related content? Thanks! https://accounts.binance.com/register?ref=P9L9FQKY
binance
Posted at 08:30h, 22 AugustYour article helped me a lot, is there any more related content? Thanks!
create a binance account
Posted at 13:08h, 22 AugustI don’t think the title of your article matches the content lol. Just kidding, mainly because I had some doubts after reading the article.
Создание учетной записи в binance
Posted at 13:57h, 22 AugustThank you for your sharing. I am worried that I lack creative ideas. It is your article that makes me full of hope. Thank you. But, I have a question, can you help me?
registrovat se na binance
Posted at 22:04h, 22 AugustI don’t think the title of your article matches the content lol. Just kidding, mainly because I had some doubts after reading the article. https://www.binance.com/cs/join?ref=S5H7X3LP
Код binance
Posted at 01:13h, 24 AugustThank you for your sharing. I am worried that I lack creative ideas. It is your article that makes me full of hope. Thank you. But, I have a question, can you help me? https://accounts.binance.info/en-IN/register-person?ref=UM6SMJM3
binance
Posted at 04:48h, 24 AugustYour point of view caught my eye and was very interesting. Thanks. I have a question for you.
100 USDT
Posted at 11:51h, 26 AugustCan you be more specific about the content of your article? After reading it, I still have some doubts. Hope you can help me.
crear una cuenta en Binance
Posted at 20:19h, 26 AugustYour article helped me a lot, is there any more related content? Thanks!
Enregistrement
Posted at 14:36h, 29 AugustYour point of view caught my eye and was very interesting. Thanks. I have a question for you. https://www.binance.info/en-IN/register?ref=UM6SMJM3
registrovat se na binance
Posted at 03:12h, 03 SeptemberCan you be more specific about the content of your article? After reading it, I still have some doubts. Hope you can help me.
binance
Posted at 11:09h, 03 SeptemberCan you be more specific about the content of your article? After reading it, I still have some doubts. Hope you can help me.
Crea account personale
Posted at 01:19h, 04 SeptemberYour article helped me a lot, is there any more related content? Thanks!
Binance开户
Posted at 19:34h, 08 SeptemberYour article helped me a lot, is there any more related content? Thanks! To mt tài khon binance
binance профил
Posted at 07:26h, 13 SeptemberReading your article helped me a lot and I agree with you. But I still have some doubts, can you clarify for me? I’ll keep an eye out for your answers.
binance
Posted at 11:36h, 16 SeptemberThanks for sharing. I read many of your blog posts, cool, your blog is very good.
binance sign up bonus
Posted at 12:05h, 27 SeptemberI don’t think the title of your article matches the content lol. Just kidding, mainly because I had some doubts after reading the article.
www.binance.com registrera dig
Posted at 01:04h, 11 OctoberI don’t think the title of your article matches the content lol. Just kidding, mainly because I had some doubts after reading the article.
binance sign up
Posted at 06:01h, 13 OctoberYour enticle helped me a lot, is there any more related content? Thanks!
binance
Posted at 04:35h, 17 OctoberI don’t think the title of your article matches the content lol. Just kidding, mainly because I had some doubts after reading the article.
Зарегистрируйтесь, чтобы получить 100 USDT
Posted at 01:34h, 19 OctoberI don’t think the title of your article matches the content lol. Just kidding, mainly because I had some doubts after reading the article.
www.binance.com sign up
Posted at 22:11h, 20 OctoberI don’t think the title of your article matches the content lol. Just kidding, mainly because I had some doubts after reading the article.
Mag-sign up upang makakuha ng 100 USDT
Posted at 09:44h, 25 OctoberYour article helped me a lot, is there any more related content? Thanks!
kostenloses binance Konto
Posted at 13:08h, 25 OctoberYour article helped me a lot, is there any more related content? Thanks!
Akun Binance Gratis
Posted at 21:53h, 25 OctoberI don’t think the title of your article matches the content lol. Just kidding, mainly because I had some doubts after reading the article.
registrera dig f"or binance
Posted at 12:19h, 26 OctoberThank you for your sharing. I am worried that I lack creative ideas. It is your article that makes me full of hope. Thank you. But, I have a question, can you help me?
binance
Posted at 15:08h, 26 OctoberThanks for sharing. I read many of your blog posts, cool, your blog is very good.
binance тркелу
Posted at 19:05h, 28 OctoberThanks for sharing. I read many of your blog posts, cool, your blog is very good.
Crie uma conta gratuita
Posted at 23:55h, 08 NovemberYour article helped me a lot, is there any more related content? Thanks!
Binance账户创建
Posted at 00:42h, 12 NovemberI don’t think the title of your article matches the content lol. Just kidding, mainly because I had some doubts after reading the article.
registrera dig f"or binance
Posted at 04:05h, 12 NovemberThank you for your sharing. I am worried that I lack creative ideas. It is your article that makes me full of hope. Thank you. But, I have a question, can you help me?
Binance代码
Posted at 21:34h, 27 NovemberI don’t think the title of your article matches the content lol. Just kidding, mainly because I had some doubts after reading the article.
免费Binance账户
Posted at 16:44h, 04 DecemberThank you for your sharing. I am worried that I lack creative ideas. It is your article that makes me full of hope. Thank you. But, I have a question, can you help me?
binance koda za napotitev
Posted at 15:48h, 03 JanuaryCan you be more specific about the content of your article? After reading it, I still have some doubts. Hope you can help me. https://accounts.binance.com/ph/register?ref=IU36GZC4
най-добър binance Препоръчителен код
Posted at 04:30h, 13 JanuaryThank you for your sharing. I am worried that I lack creative ideas. It is your article that makes me full of hope. Thank you. But, I have a question, can you help me?
Binance推荐代码
Posted at 10:46h, 22 JanuaryYour article helped me a lot, is there any more related content? Thanks!
mitolyn
Posted at 01:33h, 24 January**mitolyn**
Mitolyn is a carefully developed, plant-based formula created to help support metabolic efficiency and encourage healthy, lasting weight management.
免費binance帳戶
Posted at 23:50h, 28 JanuaryYour point of view caught my eye and was very interesting. Thanks. I have a question for you.
men balance
Posted at 21:55h, 29 January**men balance**
MEN Balance Pro is a high-quality dietary supplement developed with research-informed support to help men maintain healthy prostate function.
mounjaboost
Posted at 22:18h, 29 January**mounjaboost**
MounjaBoost is a next-generation, plant-based supplement created to support metabolic activity, encourage natural fat utilization, and elevate daily energywithout extreme dieting or exhausting workout routines.
prostafense official
Posted at 22:45h, 29 January**prostafense official**
ProstAfense is a premium, doctor-crafted supplement formulated to maintain optimal prostate function, enhance urinary performance, and support overall male wellness.
herpafend reviews
Posted at 21:43h, 30 January**herpafend reviews**
Herpafend is a natural wellness formula developed for individuals experiencing symptoms related to the herpes simplex virus. It is designed to help reduce the intensity and frequency of flare-ups while supporting the bodys immune defenses.
men balance pro
Posted at 22:12h, 30 January**men balance pro**
MEN Balance Pro is a high-quality dietary supplement developed with research-informed support to help men maintain healthy prostate function.
Cel mai bun cod de recomandare Binance
Posted at 01:25h, 31 JanuaryI don’t think the title of your article matches the content lol. Just kidding, mainly because I had some doubts after reading the article.
neuro sharp
Posted at 01:31h, 31 January**neuro sharp**
Neuro Sharp is an advanced cognitive support formula designed to help you stay mentally sharp, focused, and confident throughout your day.
boostaro official
Posted at 01:45h, 31 January**boostaro official**
Boostaro is a purpose-built wellness formula created for men who want to strengthen vitality, confidence, and everyday performance.
Registrera
Posted at 17:50h, 06 FebruaryThank you for your sharing. I am worried that I lack creative ideas. It is your article that makes me full of hope. Thank you. But, I have a question, can you help me? https://www.binance.info/register?ref=IXBIAFVY
atvērt binance kontu
Posted at 12:20h, 07 FebruaryThank you for your sharing. I am worried that I lack creative ideas. It is your article that makes me full of hope. Thank you. But, I have a question, can you help me?
cuenta gratuita en Binance
Posted at 12:43h, 07 FebruaryYour point of view caught my eye and was very interesting. Thanks. I have a question for you.
Skapa personligt konto
Posted at 18:13h, 09 FebruaryThank you for your sharing. I am worried that I lack creative ideas. It is your article that makes me full of hope. Thank you. But, I have a question, can you help me?
binance code
Posted at 05:25h, 12 FebruaryThank you for your sharing. I am worried that I lack creative ideas. It is your article that makes me full of hope. Thank you. But, I have a question, can you help me?
binance anm"alningsbonus
Posted at 07:57h, 14 FebruaryThanks for sharing. I read many of your blog posts, cool, your blog is very good.
бнанс бонус за рестрацю
Posted at 05:01h, 22 FebruaryYour article helped me a lot, is there any more related content? Thanks!
sign up binance
Posted at 18:11h, 22 FebruaryThank you for your sharing. I am worried that I lack creative ideas. It is your article that makes me full of hope. Thank you. But, I have a question, can you help me?
註冊
Posted at 01:36h, 03 MarchI don’t think the title of your article matches the content lol. Just kidding, mainly because I had some doubts after reading the article.
back biome
Posted at 07:40h, 03 March**back biome**
Backbiome is a naturally crafted, research-backed daily supplement formulated to gently relieve back tension and soothe sciatic discomfort.
Anm"al dig f"or att fa 100 USDT
Posted at 17:56h, 06 MarchCan you be more specific about the content of your article? After reading it, I still have some doubts. Hope you can help me.
neurosharp
Posted at 03:34h, 13 March**neurosharp**
Neuro Sharp is a modern brain-support supplement created to help you think clearly, stay focused, and feel mentally confident throughout the day.
nervecalm
Posted at 03:38h, 13 March**nervecalm**
NerveCalm is a high-quality nutritional supplement crafted to promote nerve wellness, ease chronic discomfort, and boost everyday vitality.
prostafense
Posted at 16:33h, 13 March**prostafense**
ProstAfense is a premium, doctor-crafted supplement formulated to maintain optimal prostate function, enhance urinary performance, and support overall male wellness.
prodentim
Posted at 17:00h, 13 March**prodentim**
ProDentim is a distinctive oral-care formula that pairs targeted probiotics with plant-based ingredients to encourage strong teeth, comfortable gums, and reliably fresh breath.
aquasculpt
Posted at 14:08h, 15 March**aquasculpt**
AquaSculpt is a high-quality metabolic support supplement created to help the body utilize fat more efficiently while maintaining steady, reliable energy levels throughout the day.
prodentim
Posted at 06:13h, 16 March**prodentim**
ProDentim is a distinctive oral-care formula that pairs targeted probiotics with plant-based ingredients to encourage strong teeth, comfortable gums, and reliably fresh breath.
boostaro
Posted at 06:14h, 16 March**boostaro**
Boostaro is a purpose-built wellness formula created for men who want to strengthen vitality, confidence, and everyday performance.
nativegut
Posted at 06:27h, 16 March**nativegut**
NativeGut is a precision-crafted nutritional blend designed to nurture your dog’s digestive tract.
manergy
Posted at 07:46h, 16 March**manergy**
Manergy is an advanced male vitality supplement created to help support healthy testosterone levels
nervegenics
Posted at 07:52h, 16 March**nervegenics**
NerveGenics is a naturally formulated nerve-health supplement created to promote nerve comfort, cellular energy support, antioxidant defense
nervecalm
Posted at 21:47h, 16 March**nervecalm**
NerveCalm is a high-quality nutritional supplement crafted to promote nerve wellness, ease chronic discomfort, and boost everyday vitality.
native gut
Posted at 23:08h, 16 March**native gut**
NativeGut is a precision-crafted nutritional blend designed to nurture your dog’s digestive tract.
purdentix
Posted at 23:12h, 16 March**purdentix**
PurDentix is a revolutionary oral health supplement designed to support strong teeth and healthy gums. It tackles a wide range of dental concerns
heroup
Posted at 23:13h, 16 March**heroup**
HeroUP is a premium mens wellness formula designed to support sustained energy, physical stamina, and everyday confidence.
citrusburn
Posted at 23:19h, 16 March**citrusburn**
CitrusBurn is a Mediterranean-inspired thermogenic formula created to support a naturally slower metabolism, encourage efficient fat utilization.
insuleaf
Posted at 00:31h, 17 March**insuleaf**
InsuLeaf is a high-quality, naturally formulated supplement created to help maintain balanced blood glucose, support metabolic health, and boost overall vitality.
prosta peak
Posted at 01:06h, 17 March**prosta peak**
Prosta Peak is a high-quality prostate wellness supplement formulated with a comprehensive blend of 20+ natural ingredients and essential nutrients to support prostate health
prostadine
Posted at 15:16h, 17 March**prostadine**
Prostadine concerns can disrupt everyday rhythm with steady discomfort, fueling frustration and a constant hunt for dependable relief.
kerassentials
Posted at 15:33h, 17 March**kerassentials**
Kerassentials is an entirely natural blend crafted with 4 potent core oils and enriched by 9 complementary oils and vital minerals.
Anonymous
Posted at 03:32h, 21 MarchThank you for your sharing. I am worried that I lack creative ideas. It is your article that makes me full of hope. Thank you. But, I have a question, can you help me? https://www.binance.com/register?ref=JW3W4Y3A
Registrera
Posted at 18:59h, 27 MarchI don’t think the title of your article matches the content lol. Just kidding, mainly because I had some doubts after reading the article. https://accounts.binance.info/register-person?ref=JW3W4Y3A
Binance
Posted at 11:04h, 28 MarchThanks for sharing. I read many of your blog posts, cool, your blog is very good.
注册Binance
Posted at 21:06h, 28 MarchThanks for sharing. I read many of your blog posts, cool, your blog is very good.
Binance美国注册
Posted at 15:13h, 02 AprilI don’t think the title of your article matches the content lol. Just kidding, mainly because I had some doubts after reading the article. https://accounts.binance.info/en-NG/register-person?ref=YY80CKRN
Sign up to get 100 USDT
Posted at 11:22h, 04 AprilCan you be more specific about the content of your article? After reading it, I still have some doubts. Hope you can help me. https://www.binance.com/register?ref=JW3W4Y3A
registrovat se na binance
Posted at 04:12h, 08 AprilCan you be more specific about the content of your article? After reading it, I still have some doubts. Hope you can help me. https://accounts.binance.com/de-CH/register-person?ref=W0BCQMF1
binance registrering
Posted at 14:03h, 11 AprilCan you be more specific about the content of your article? After reading it, I still have some doubts. Hope you can help me. https://www.binance.info/register?ref=JW3W4Y3A
ufo777
Posted at 13:02h, 12 April#ufo777 #situsjudiufo777 #ufo777terpercaya #slotgacorufo777 #ufo777indonesia #linkalternatifufo777 #daftaruafo777 #loginufo777 #promoufo777 #agenjudiufo777 #ufo777resmi
binance kod
Posted at 17:24h, 13 AprilI don’t think the title of your article matches the content lol. Just kidding, mainly because I had some doubts after reading the article. https://accounts.binance.info/da-DK/register?ref=V3MG69RO
anm"ala dig till binance
Posted at 18:04h, 13 AprilCan you be more specific about the content of your article? After reading it, I still have some doubts. Hope you can help me.
Binance开户
Posted at 06:56h, 16 AprilI don’t think the title of your article matches the content lol. Just kidding, mainly because I had some doubts after reading the article. https://accounts.binance.info/register-person?ref=IHJUI7TF
Luck8 com
Posted at 13:35h, 16 AprilWebsite: https://luck8.deal/
SC88
Posted at 07:45h, 18 Aprillà cổng game trực tuyến cung cấp cá cược thể thao, casino live và slot game đa dạng lựa chọn. Hệ thống bảo mật hiện đại, giao dịch nhanh cùng nhiều khuyến mãi hấp dẫn mỗi ngày giúp người chơi yên tâm tham gia. Website: https://tuyensinhnganhan.com/
^Inregistrare
Posted at 08:04h, 20 AprilI don’t think the title of your article matches the content lol. Just kidding, mainly because I had some doubts after reading the article.
Binance
Posted at 12:45h, 23 AprilYour point of view caught my eye and was very interesting. Thanks. I have a question for you.
7M
Posted at 06:55h, 26 April7M hoạt động như một nền tảng dữ liệu bóng đá số với các chuyên mục như tỷ số trực tuyến, bảng xếp hạng, lịch thi đấu và tỷ lệ kèo từ nhiều nhà cái uy tín. Website cung cấp thống kê chi tiết từng trận đấu, phân tích phong độ, lịch sử đối đầu và nhận định trước trận đấu giúp người xem có góc nhìn tổng quan. Dữ liệu được cập nhật liên tục theo thời gian thực giúp người dùng theo dõi diễn biến trận đấu nhanh và chính xác. Ngoài ra nền tảng còn cung cấp nhiều bài phân tích, soi kèo và thông tin bóng đá chuyên sâu giúp người chơi và người hâm mộ dễ dàng theo dõi và tra cứu thông tin tại 7M.
nohu90
Posted at 14:59h, 26 Aprilnohu90 là cổng game nổ hũ đổi thưởng chất lượng cao, cung cấp nhiều trò chơi hấp dẫn như slot, bắn cá và game bài online. Nền tảng hoạt động mượt mà, bảo mật tốt và hỗ trợ giao dịch nhanh chóng.
binance bonus za prijavo
Posted at 14:12h, 27 AprilYour article helped me a lot, is there any more related content? Thanks! https://www.binance.info/register?ref=IXBIAFVY
binance
Posted at 20:51h, 28 AprilThanks for sharing. I read many of your blog posts, cool, your blog is very good. https://www.binance.bh/register?ref=QCGZMHR6